
Ethan's Temperature Quilt

Temperature quilts - so many possibilities... They can represent high and low temperatures... just the high, just the low, the mean temperature... oh the insanity you can inspire when you start thinking about creating a temperature quilt.
But first, what is a temperature quilt? It's just as simple and complex as the name indicates. It's a color representation of temperatures for a span of time in a particular place. In this case, it's the representation of the daily highs & lows in the year (& the city where) my grandson Ethan was born.
Last year, I showed him many of the different styles of temperature quilts. Unfortunately, he didn't see anything he really liked. So, I pulled up pictures of quilt patterns that I could adapt into a temperature quilt. (You can Google Temperature Quilts and find lots and lots of pictures. Pinterest is also a great source.) He chose the chevron pattern. So, off I "ran" to find a pattern I could use - to no avail. That lead to me sketching up some samples of possible layouts/styles. Then it was a matter of adapting his choice into a pattern, determining the size of the blocks, and creating a foundation paper-piecing pattern. This also provided me with the opportunity to learn how to use (a little bit of) my EQ8 (quilt design) program.
Now, I know many of you will say "ugh, paper piecing". But I will say to you, it's not that bad! I love FPP because it's so easy to get those perfect points & seams. There's no guessing that you got it "just right", cut the pieces correctly, did the perfect scant 1/4" seam, and all the other nightmares of trying to creat the "perfect" quilt. In this case it also allowed me to easily prep to make the quilt. You see, I printed a pattern piece for each day. On each piece I wrote the date with the high and low temperatures. So while piecing each block I didn't have to look at a separate piece of paper for reference. Just grab a month of block patterns and "go to town".
The only thing left to determine the color chart. Ethan picked the background color and left the temperature colors up to me. I researched the temperatures (www.weatherunderground.com) and listed them out on notebook paper by date. I found the highest and lowest temperatures and determined that I wanted to group the temperatures into 5 degree increments (20-24, 25-29, 30-34, you get the idea) and then figured out the colors for each increment. I like to use the color sequence of the rainbow ROYGBIV. Where R is the hottest working down to V representing the coldest.
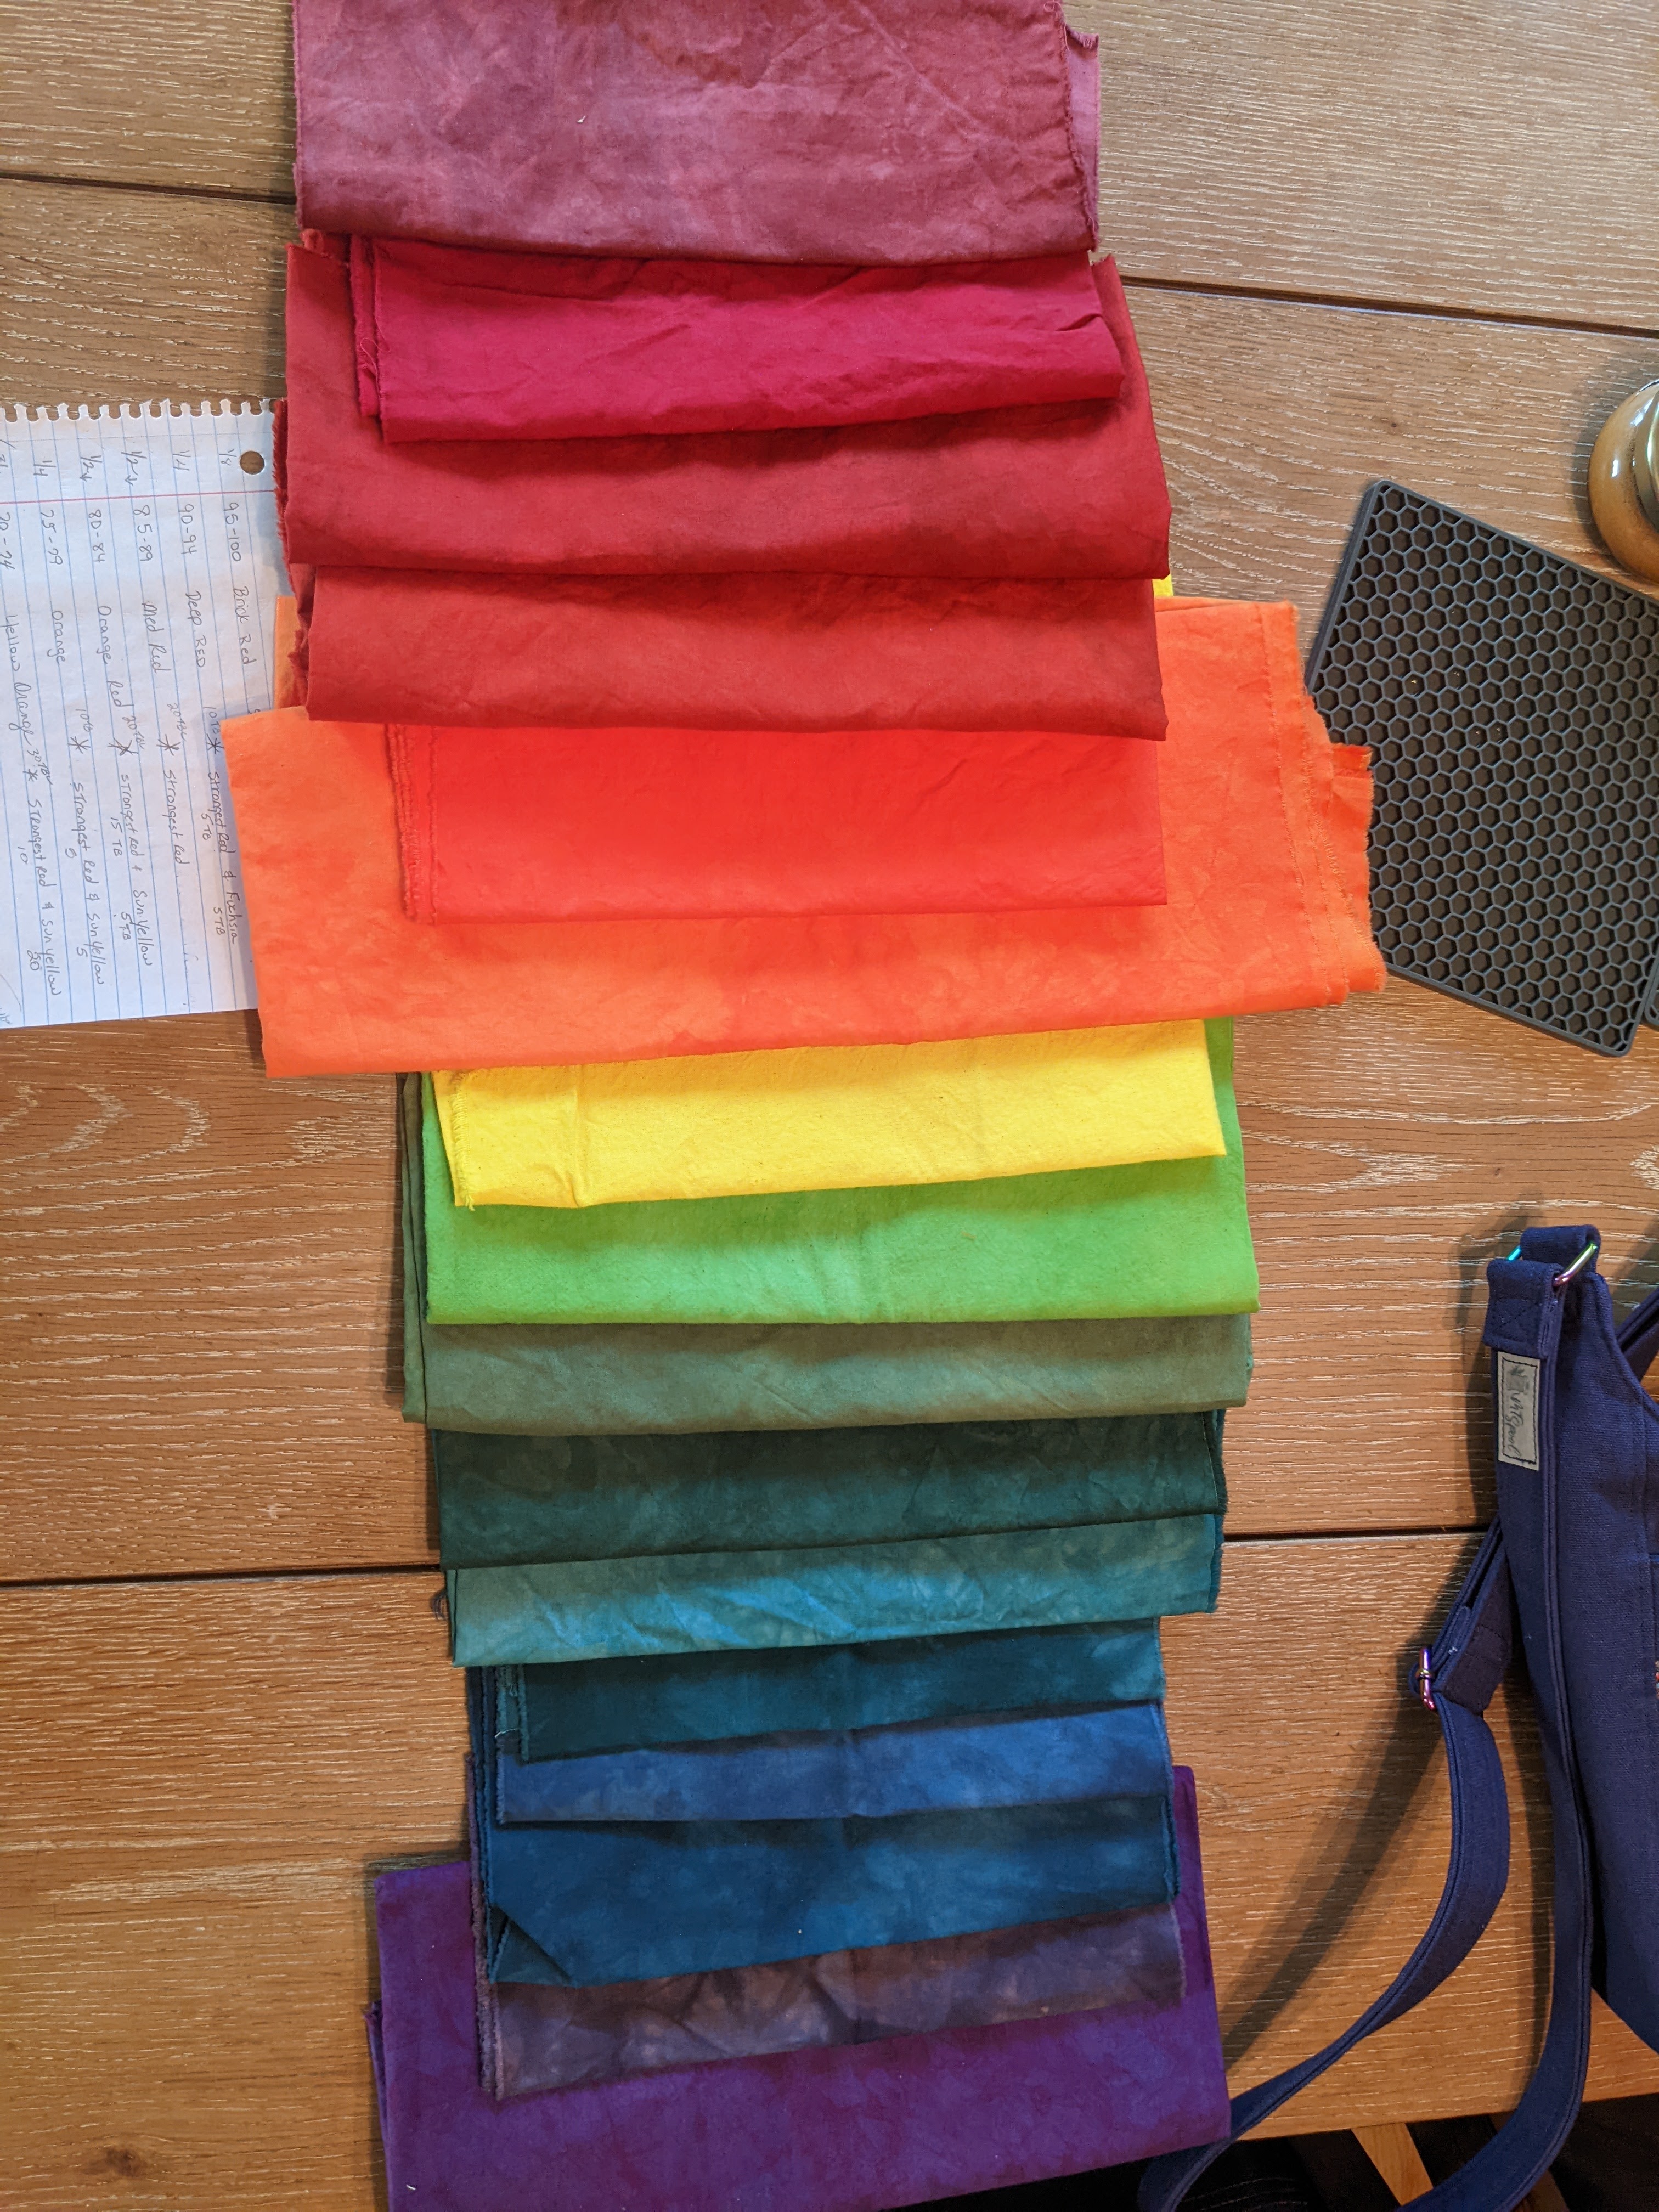
I have to admit that I'm not a big fan of true solids and I didn't want to use print fabrics for this quilt. So I chose to use tonal fabrics and that lead to me dyeing the fabric I needed for each color (except the background - that's a solid I bought at a local quilt shop). I used the pattern to determine the size of the fabric pieces and then used the temperature list to tally how many pieces I would need of each color. Then I used that to determine how much fabric of each color I needed to dye (with a little extra for creating a "color legend" on the border or back).
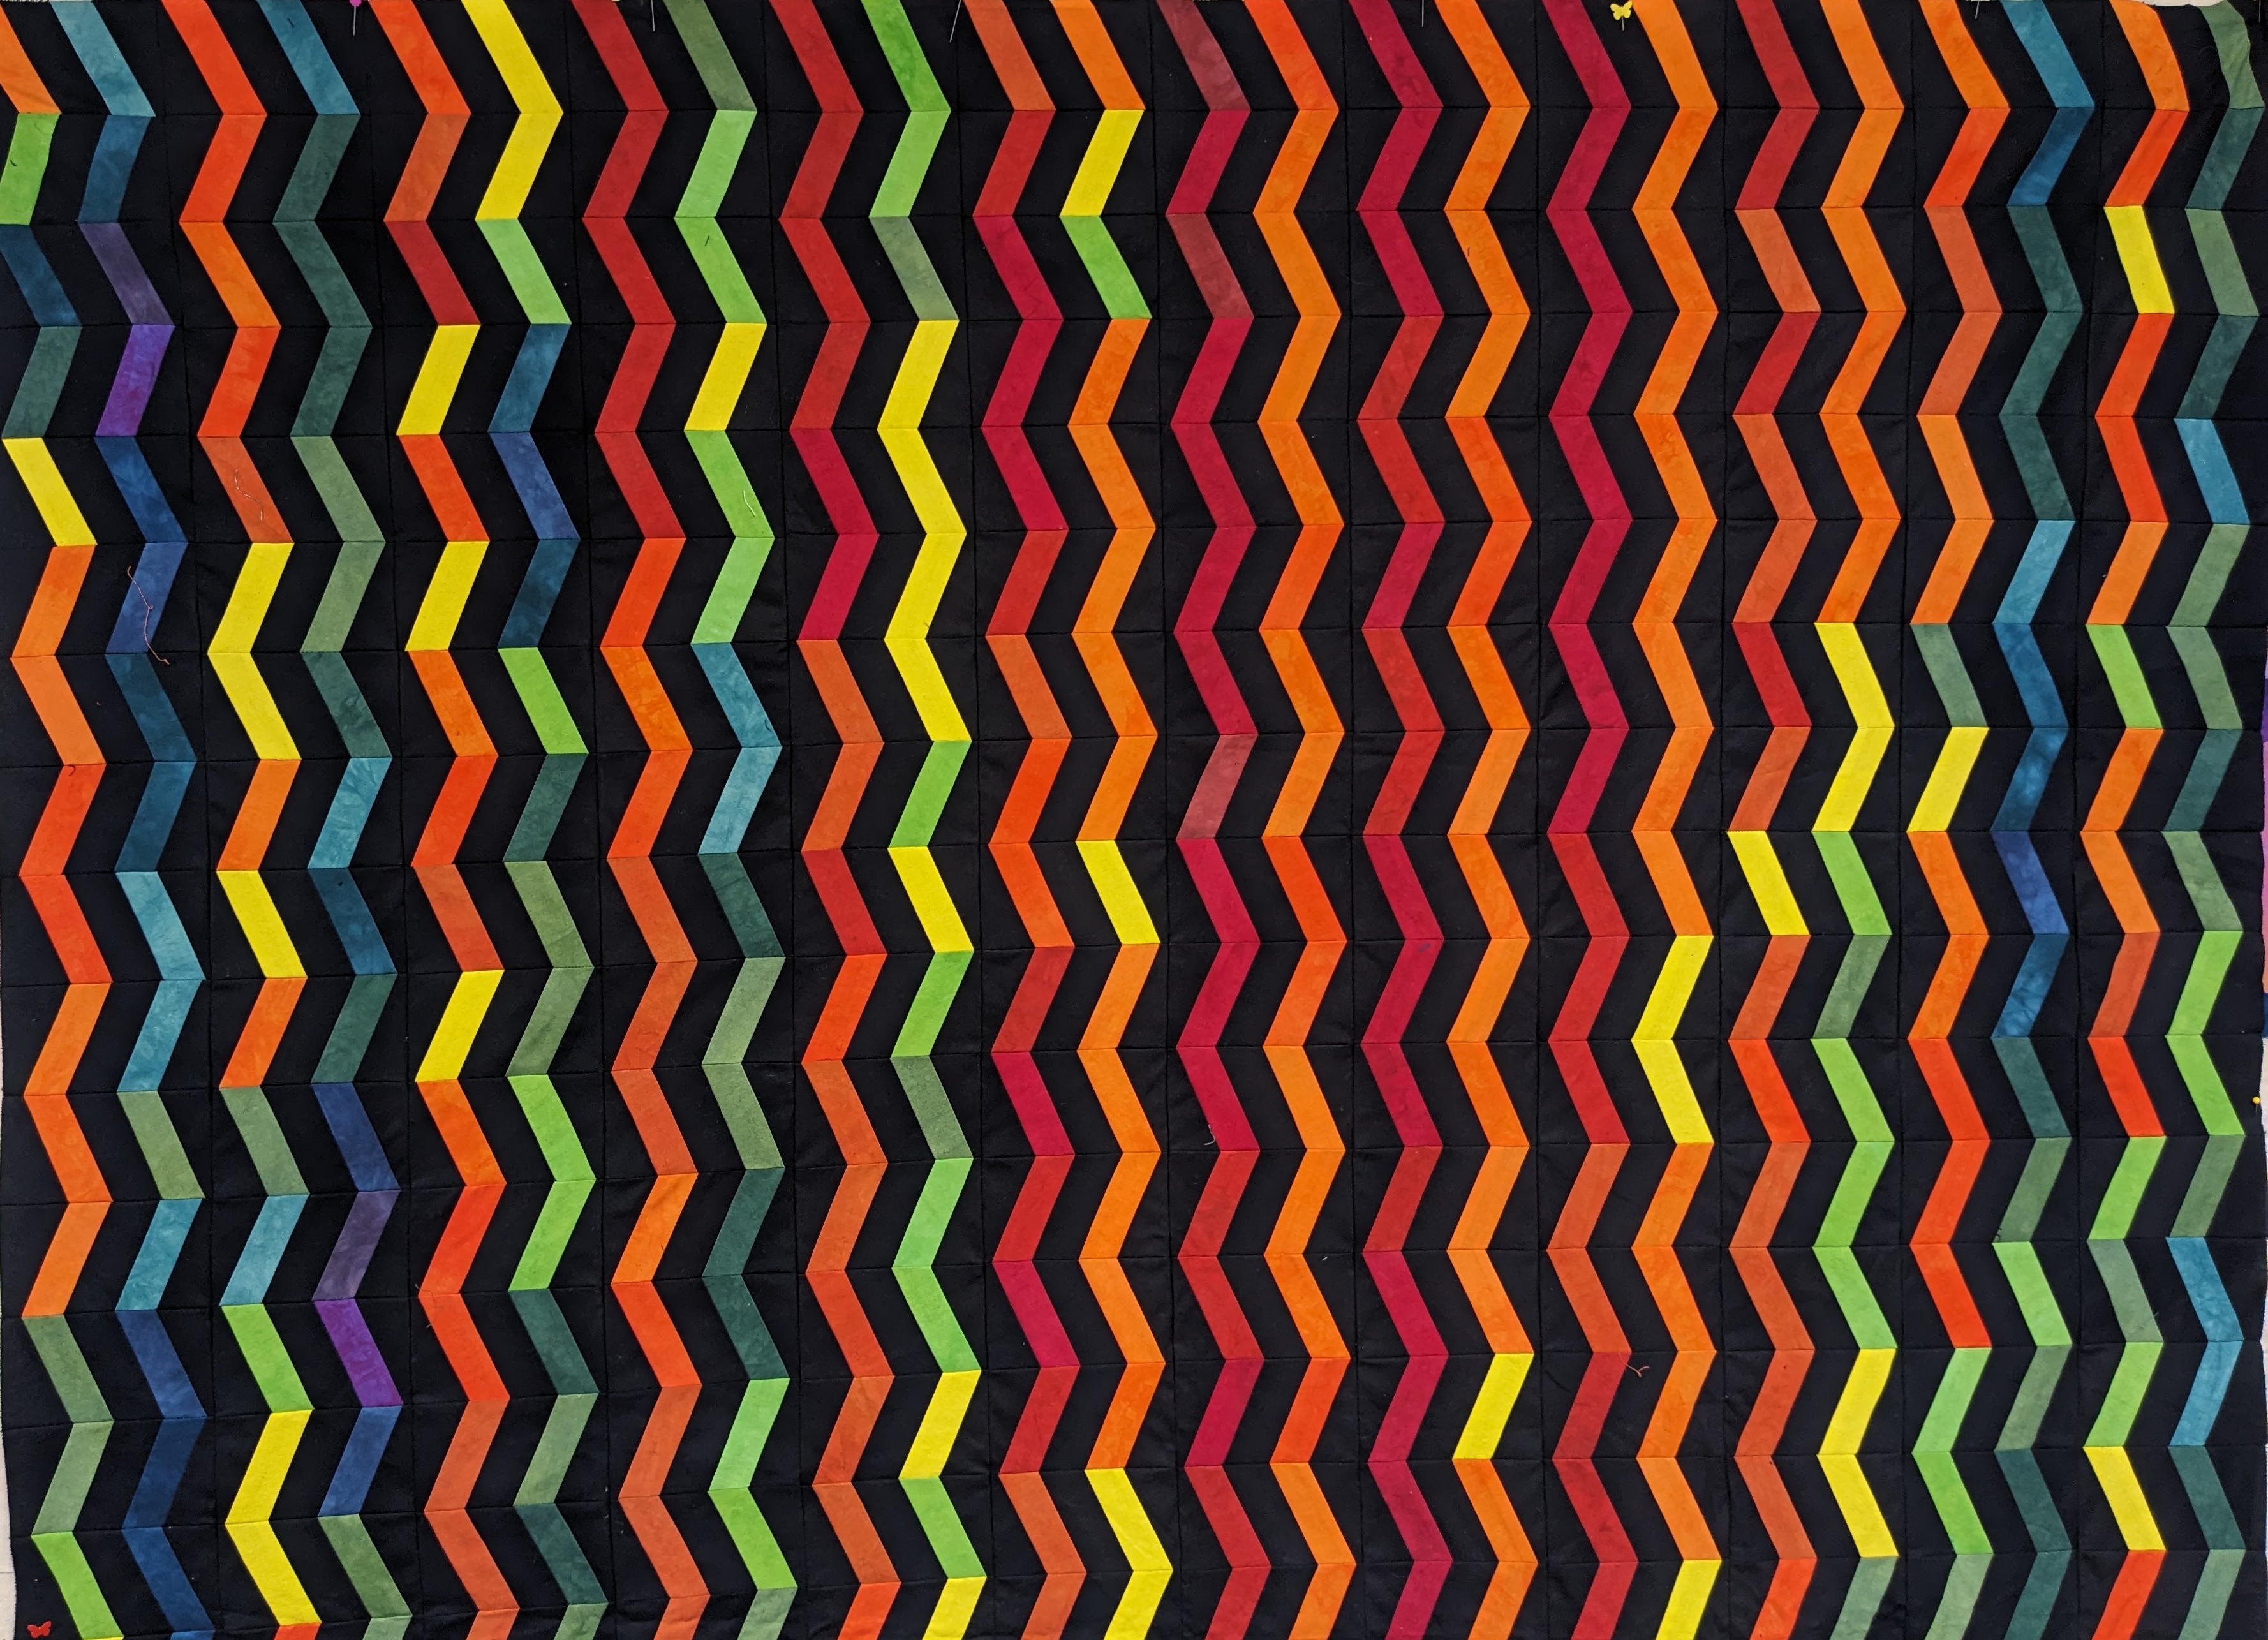
Then it was a matter of sewing the blocks. When you are sewing so many of the same blocks it's easy to chain piece them. I worked them a month at a time. First, I glued the first black piece into place, then sewed on the first color strip. After finishing all that month's first seams, I pressed the pieces open, attached the middle black pieces, sewed them on, pressed them open, then continued with the 2nd color and final black pieces in the same way. You will see that I chose to orient the blocks so the high temperatures are on the left and lows are on the right. I also pieced the blocks so that the seams "nest" when I sewed the blocks together. Nesting is when you press the fabrics at the seams (that will be sewn together) in opposite directions and use the bulk of the seams to bump together and help ensure that your seams are "right & tight". In this case I started the odd-days blocks from the left and the even-days blocks from the right.
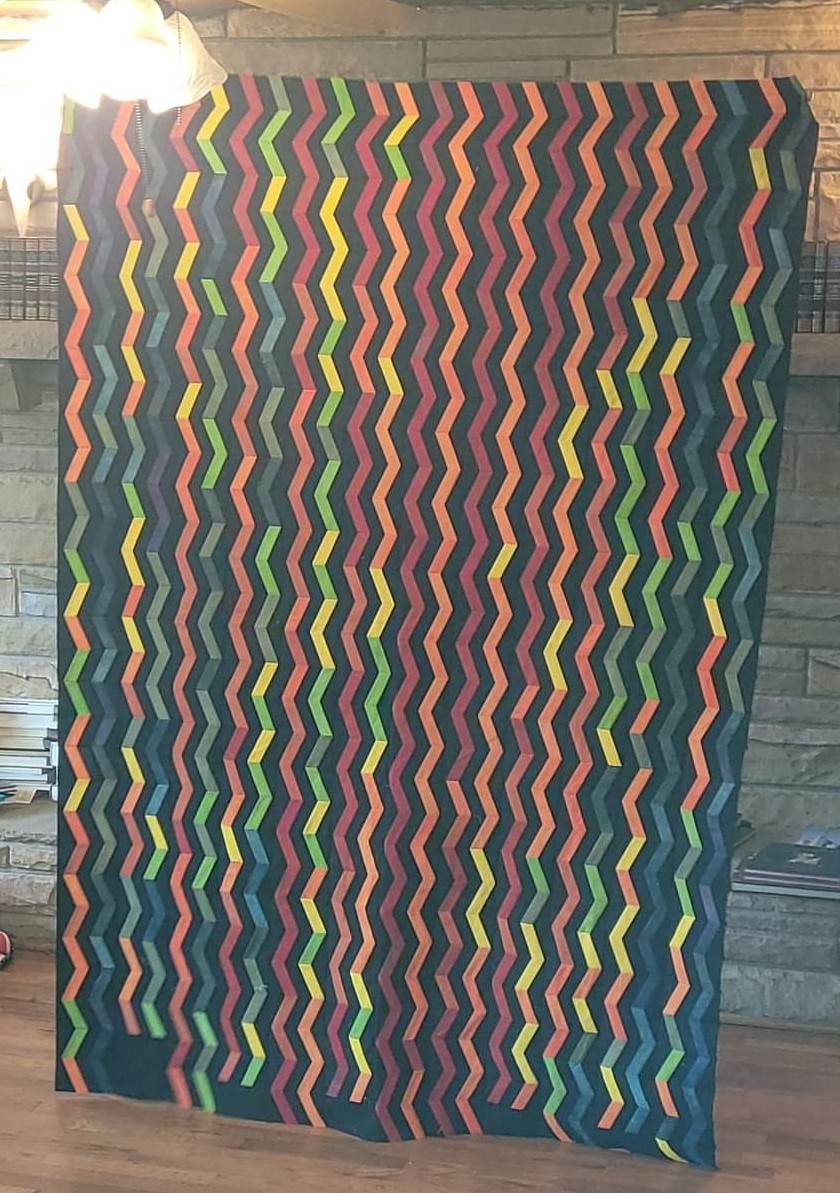
After completing a month's worth of blocks, I trimmed them to a 1/4" seam around the block frame. Then it was a matter of sewing the blocks into a column. Starting with the first day of the month and keeping the high temperatures on the left side. And, YES, I got overconfident and let myself get distracted and sewed 2 full columns backwards (with the low temperatures on the left). I didn't figure it out until I hung all the columns on the design wall and saw the colors were wrong. Jack (my trusty seam ripper) and I had some seriously tiresome quality time while he corrected my mistakes.
Once all the months were assembled, I calculated the size of the blank blocks (for the months with less than 31 days) , cut them and added them to the bottom of their respective columns. After a good pressing of the seams alternating directions for each month (January seams pressed downward, February seams pressed upward,etc - again to aid in alignment of the blocks "nesting the seams"), I sewed the columns together. This was a happy day!!! I actually completed this part of the quilt top while at a quilt retreat.
Now, I have worked out a border pattern that my grandson likes and will begin working on that as soon as I can. I'll leave that part to be a surprise in a future blog post.
If you would like a copy of the chevron FPP pattern piece, I will be happy to share it with you. FPP Chevron Pattern This pattern assumes that you are familiar with FPP. It does include hints & tips to help you avoid some of my "oopsies".
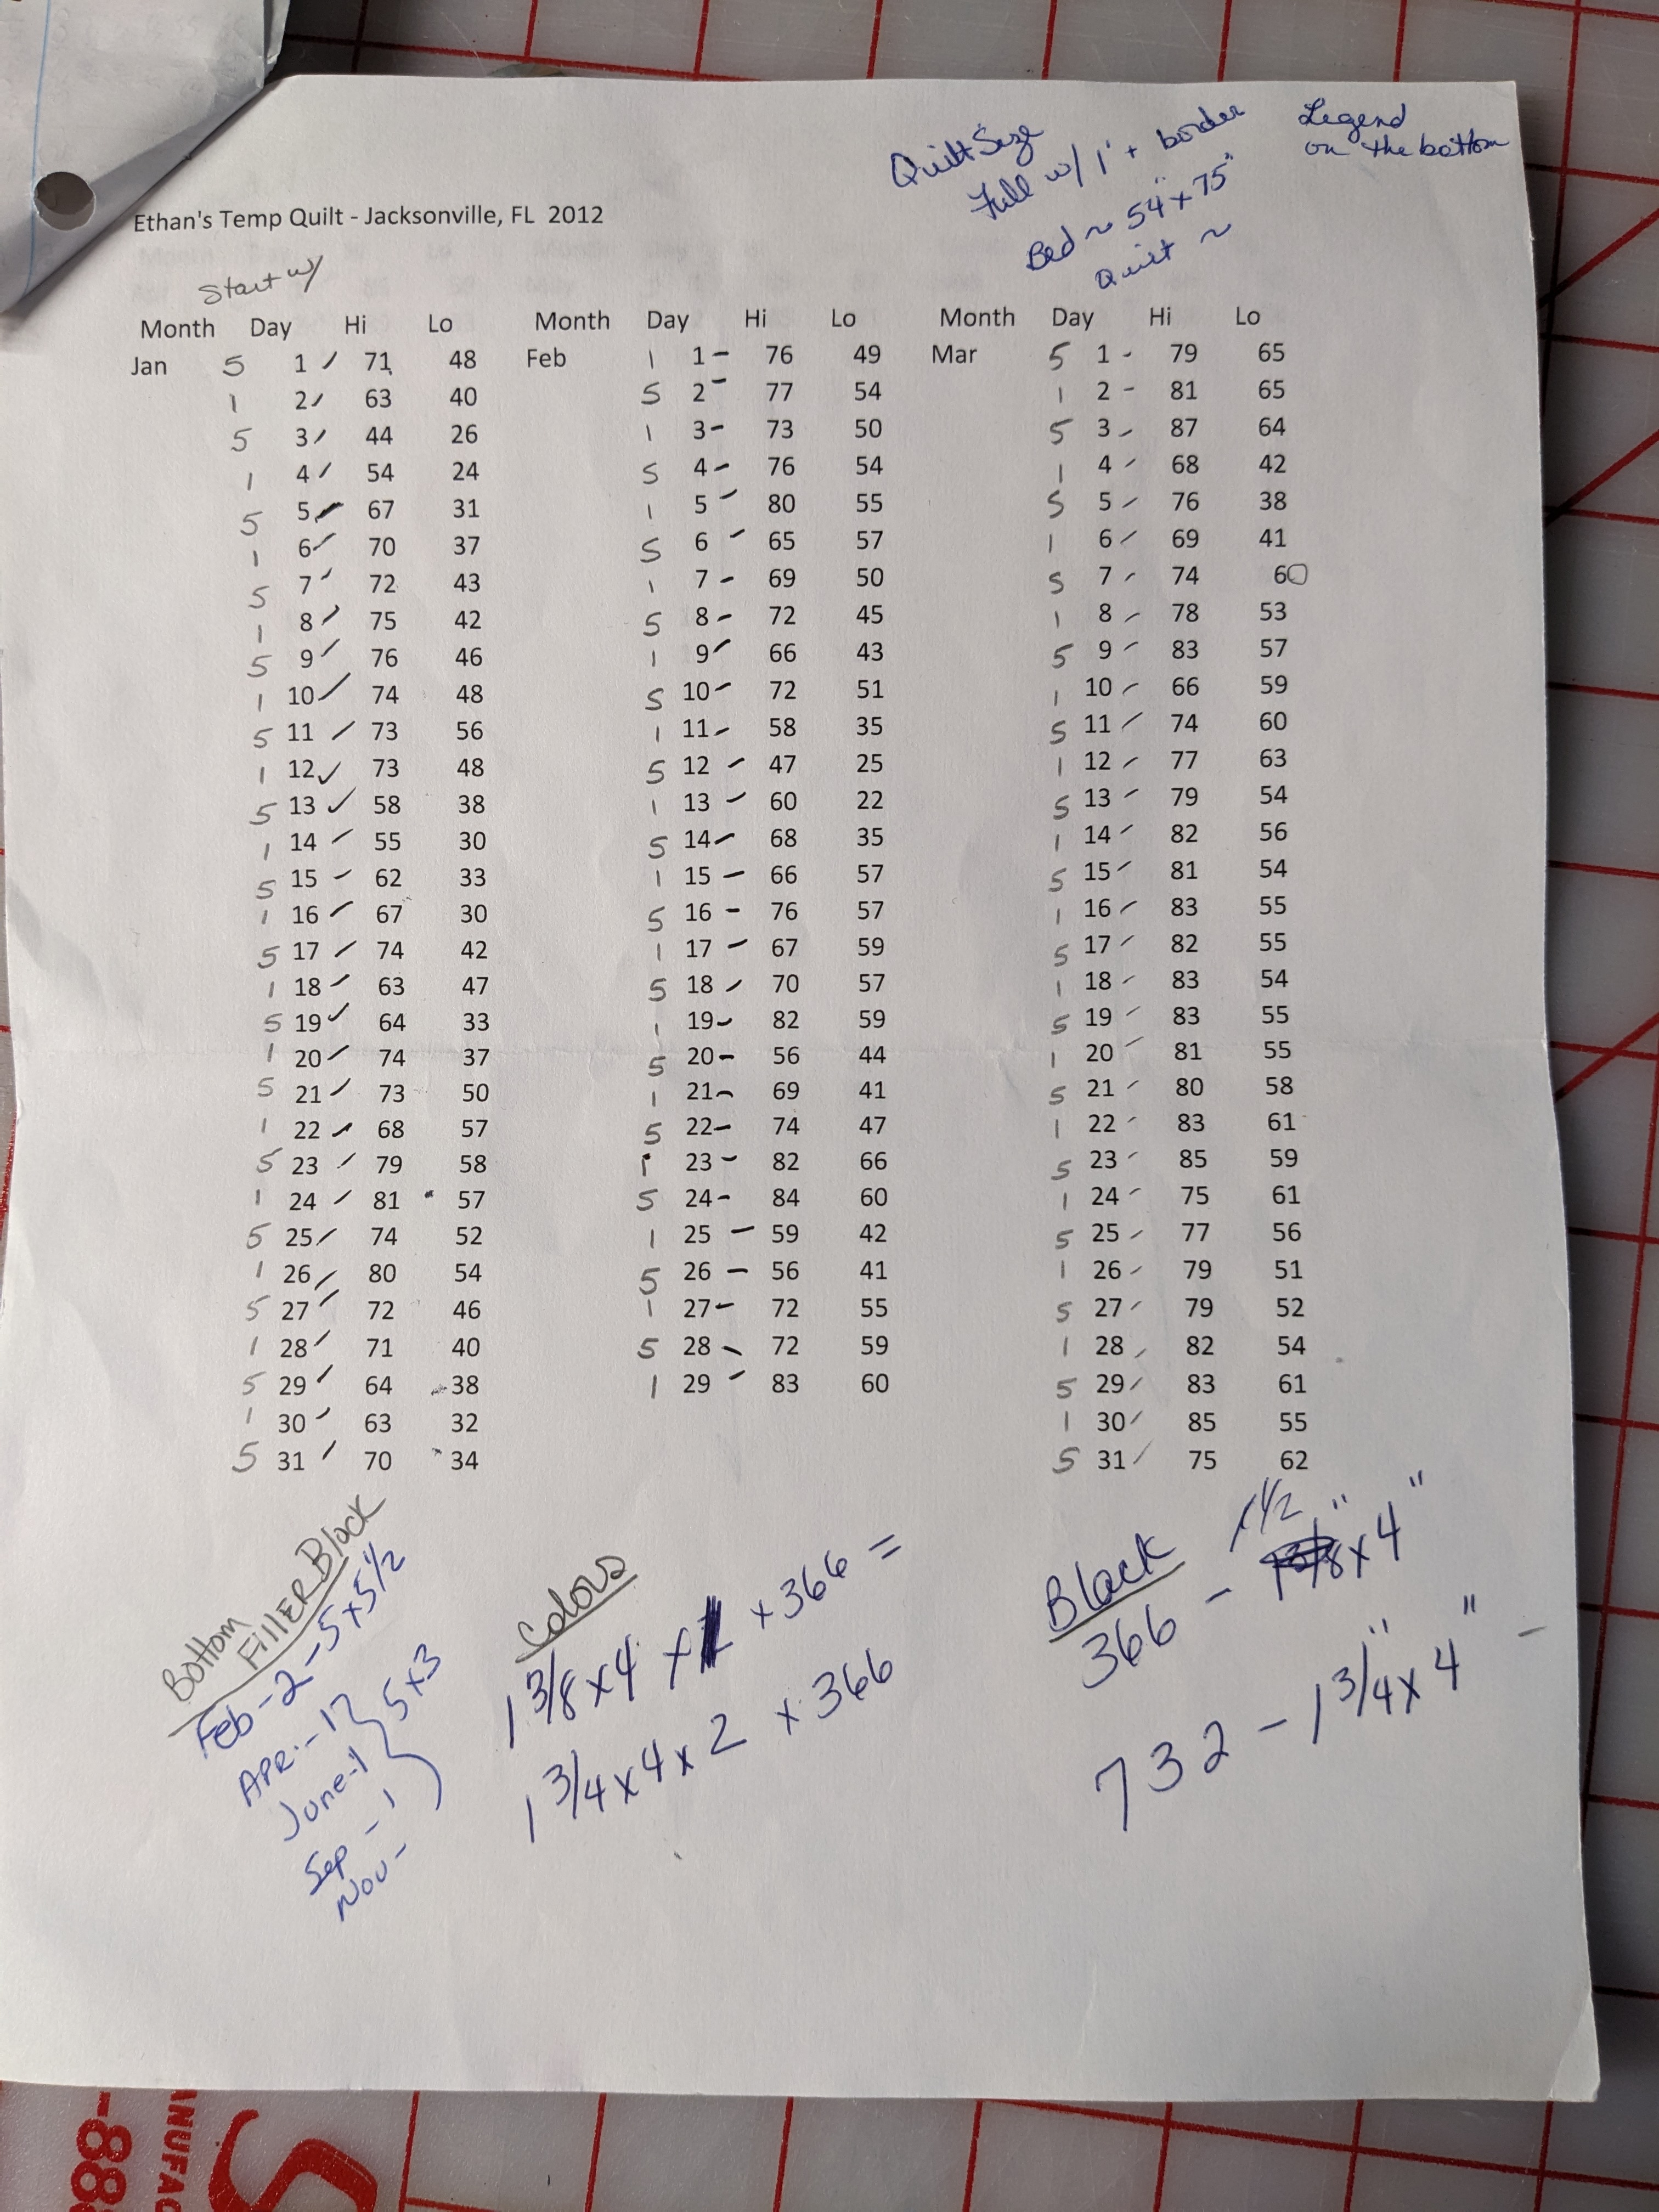
Daily log of temperatures. Also, has handwritten notes on the size of the blank filler blocks, the size I want the quilt to be, and the size I need to cut the color and black pieces for the paper-piece blocks (based on the finished size of the blocks).
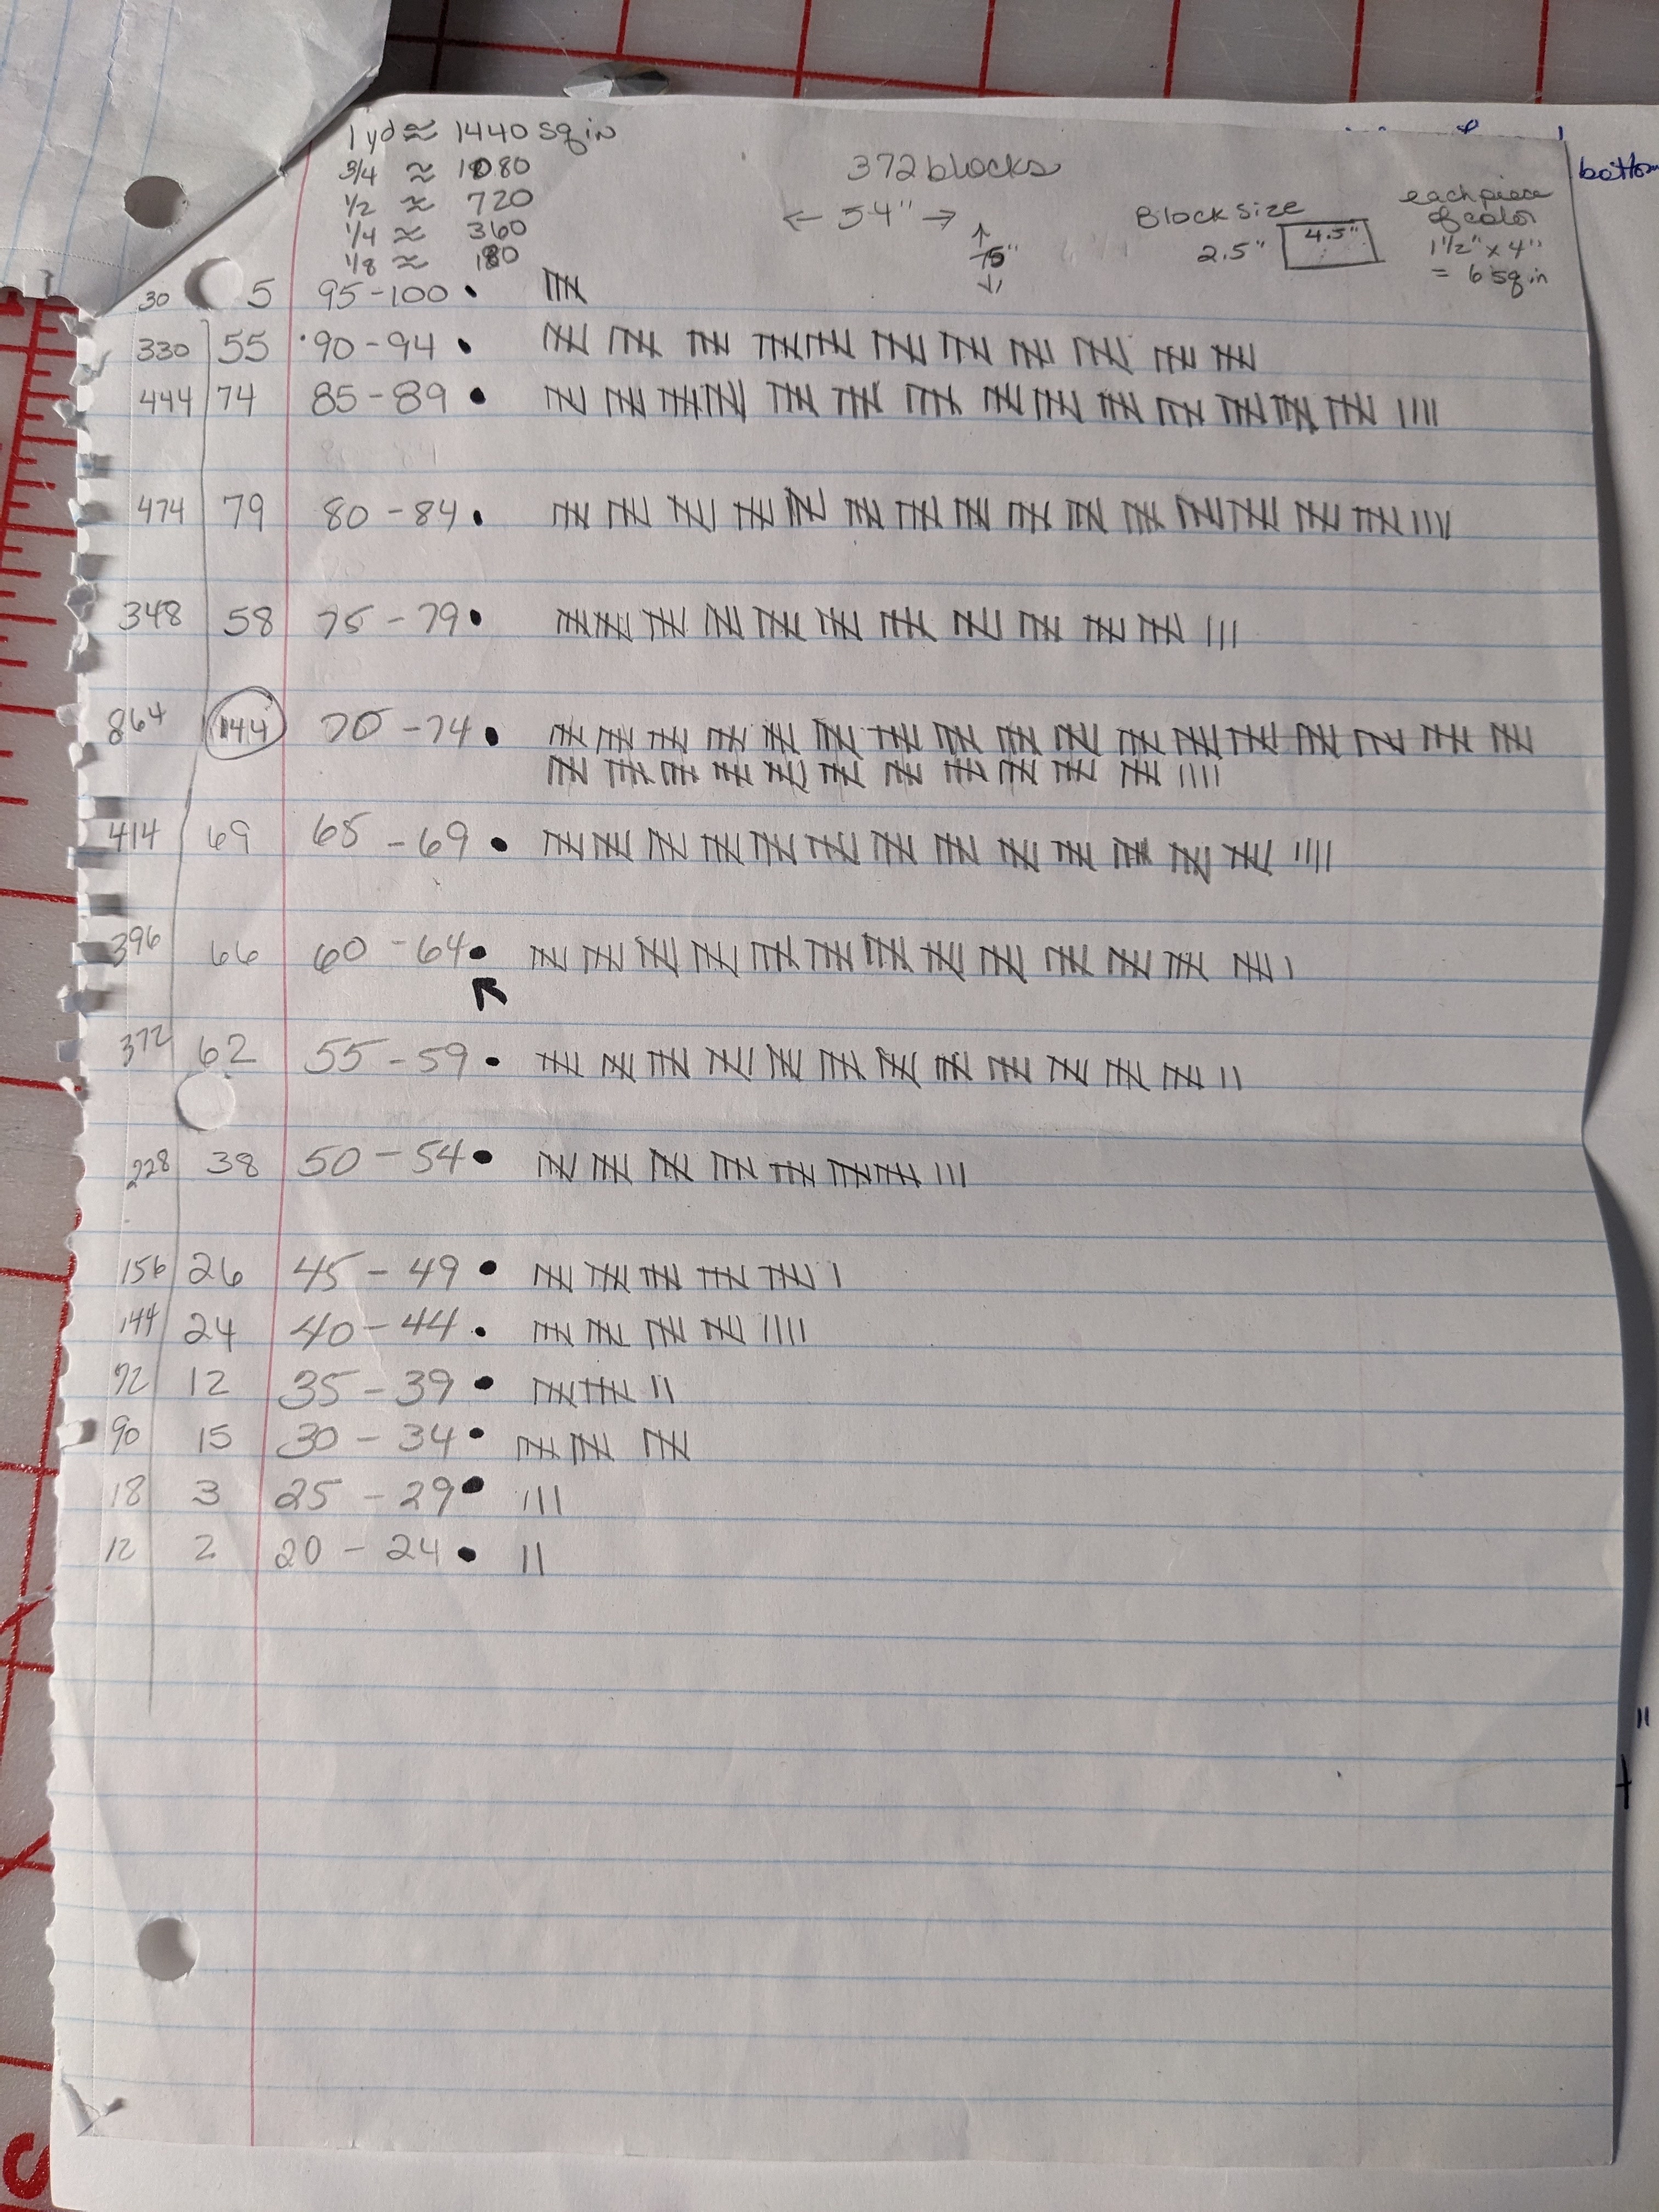
Here's the tally for each temperature group. Across the top you can see where I have created a note about how many square inches are in each major cut of a yard of fabric (there is roughly 180 sq inches of fabric in 1/8th of a yard, 360 in 1/4 of a yard, etc). You will also see where I started calculating the area that I wanted to cover with the temperature portion of the quilt (54" wide x 75" long - 54"/12 months= 4.5"; 75"/31 days= 2.5"; therefore the finished block size is 4.5"x2.5"). The final calculation is how big each colored piece of fabric will need to be (1.5" x 4"). On the far left there are 2 columns - the first is the total square inches of each color I will need that is based on the total number of pieces I'll need for each color which is totalled in the 2nd column. (i.e. 95-100 - need a total of 5 pieces. Each color piece is 6 square inches. So I need 30 square inches of brick red for the 5 times I'll use it in a block. But I will also need more - for a temperature legend I'll add somewhere on the quilt.)
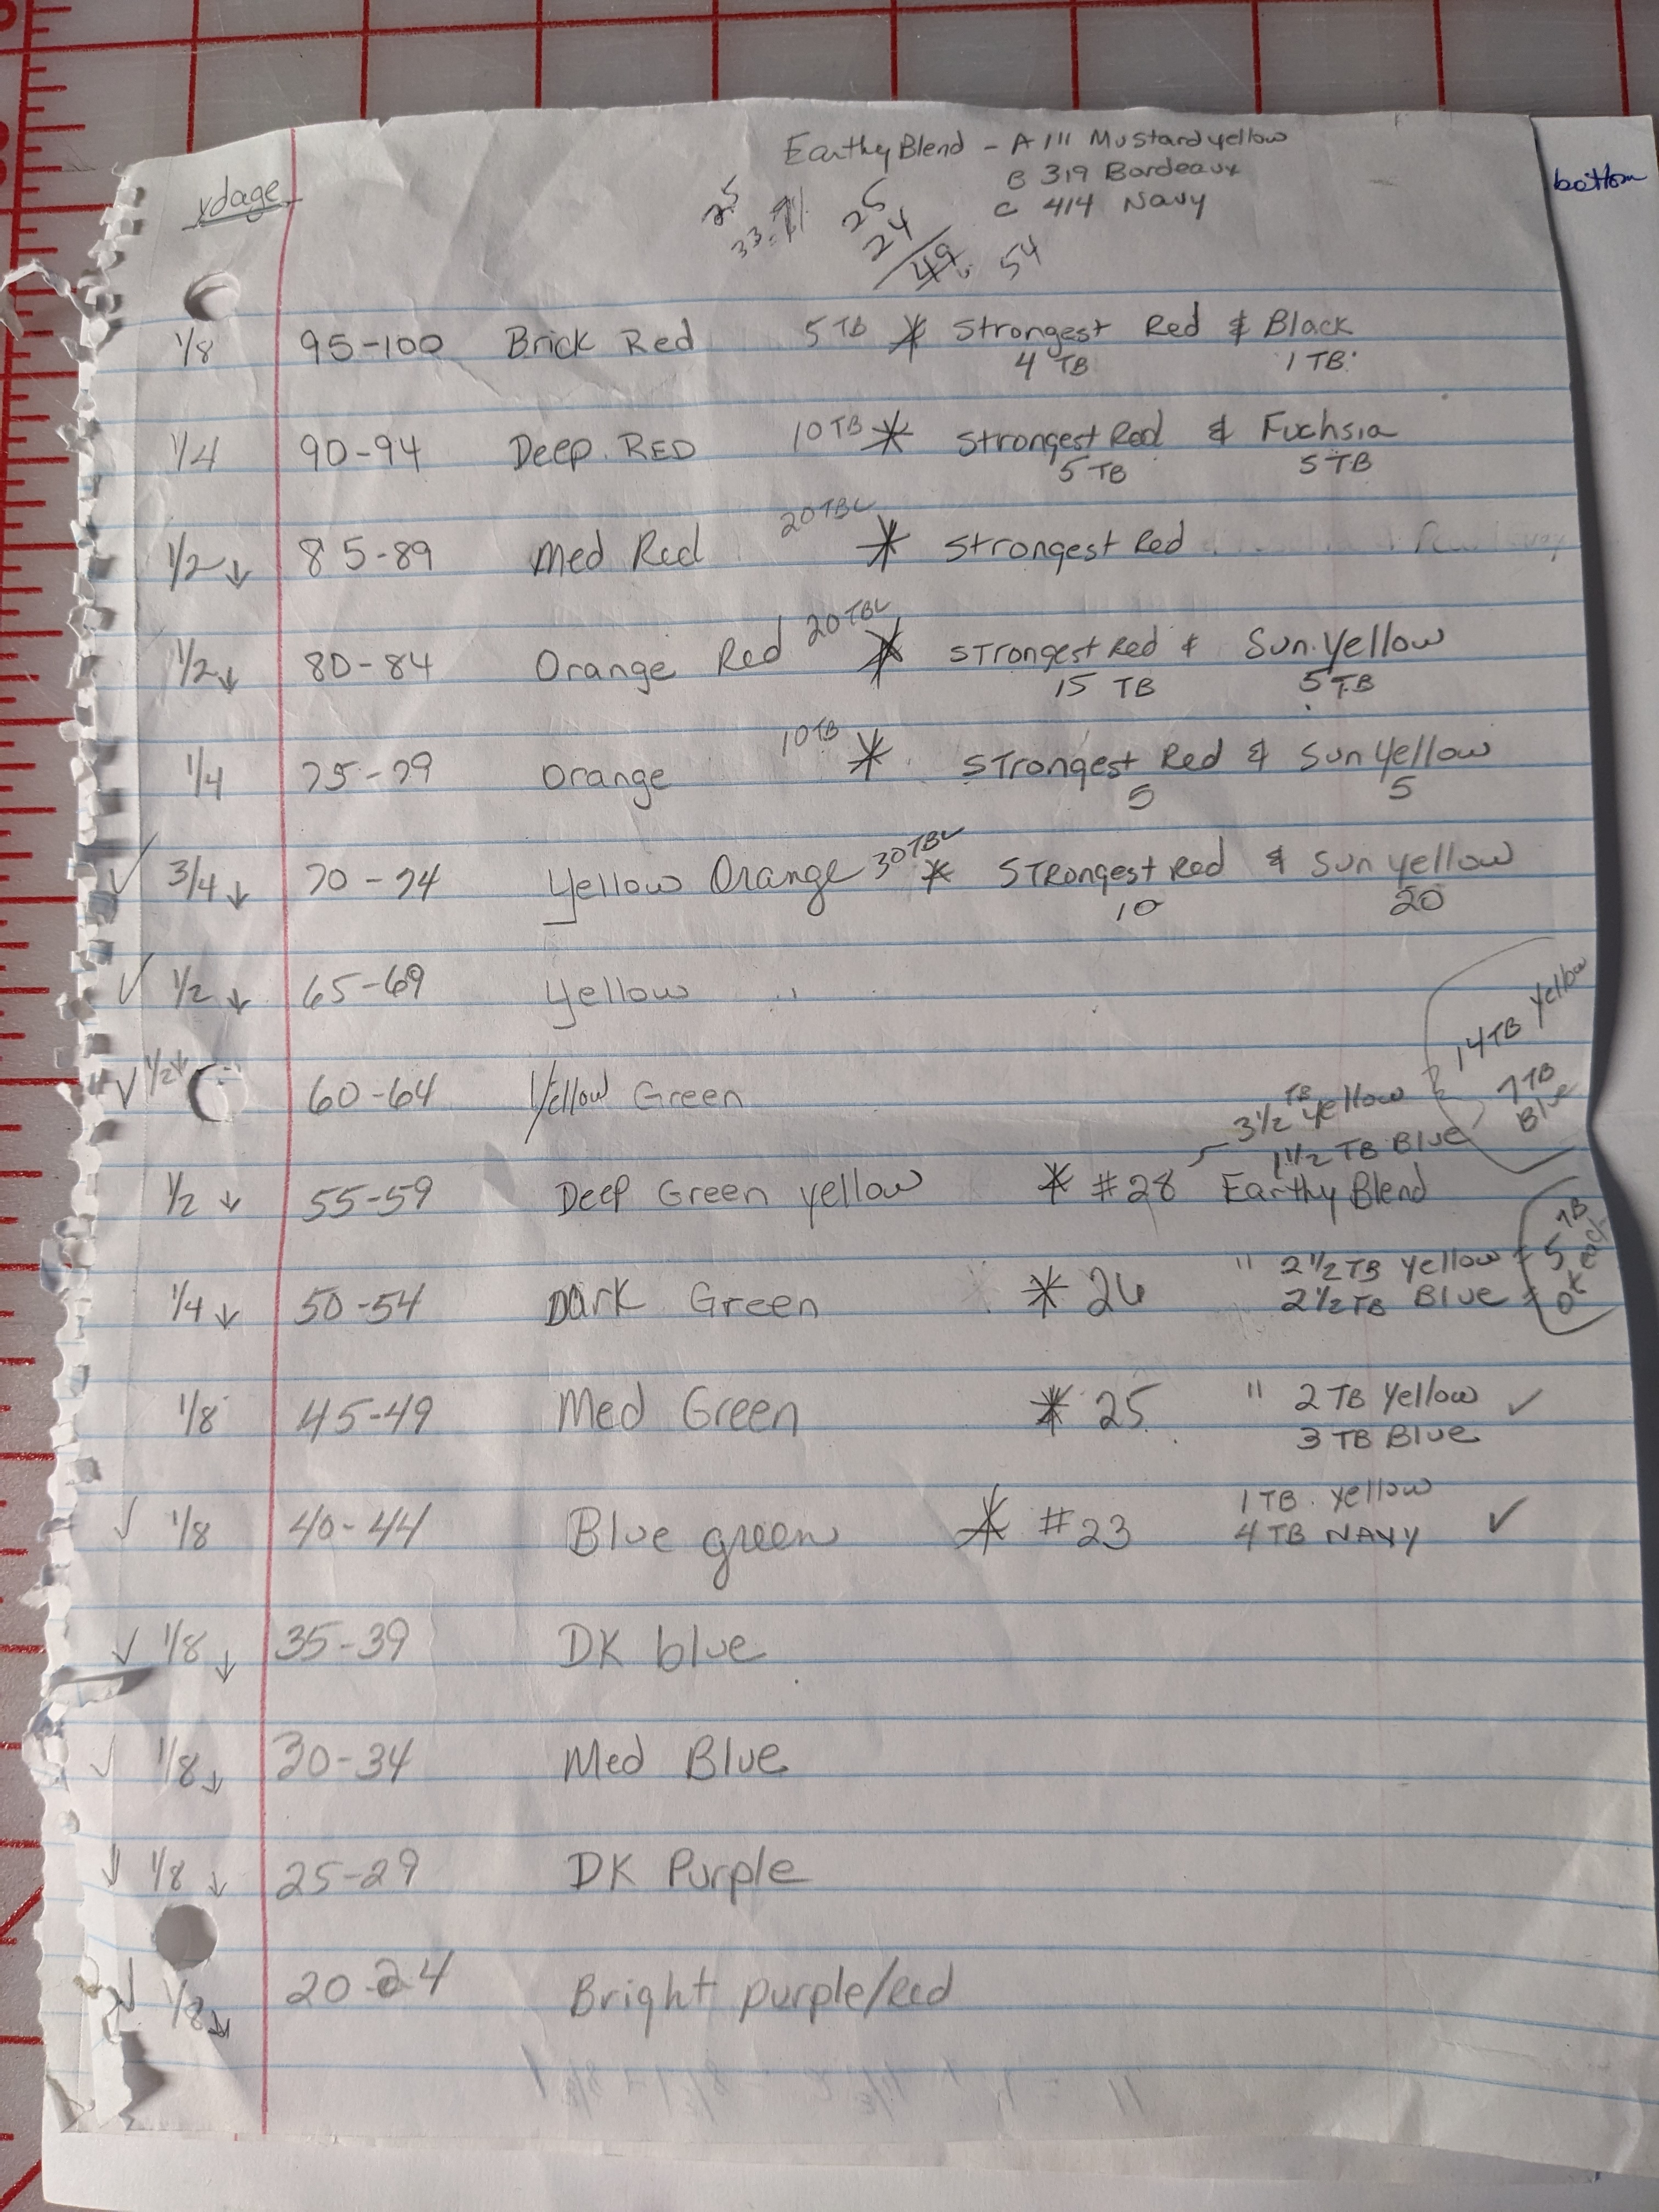
This is the summary of how much of each color fabric I'll need, what the temperature range is for the color, what color I need for each range, and the color formula I used (roughly). I used dyes from Pro Chemical and Dye. I experimented with their Earthy Blend kit to find the right colors for each temperature range. Then used that mixture formula to extrapolate how much of each color I would need for each of the different quantities of fabric I needed to dye. (It's also important to note that I should have made more than I planned for because we decided to add more pieces of the colors in the border. Therefore, I had to dye a bit more of several colors to complete the border.)
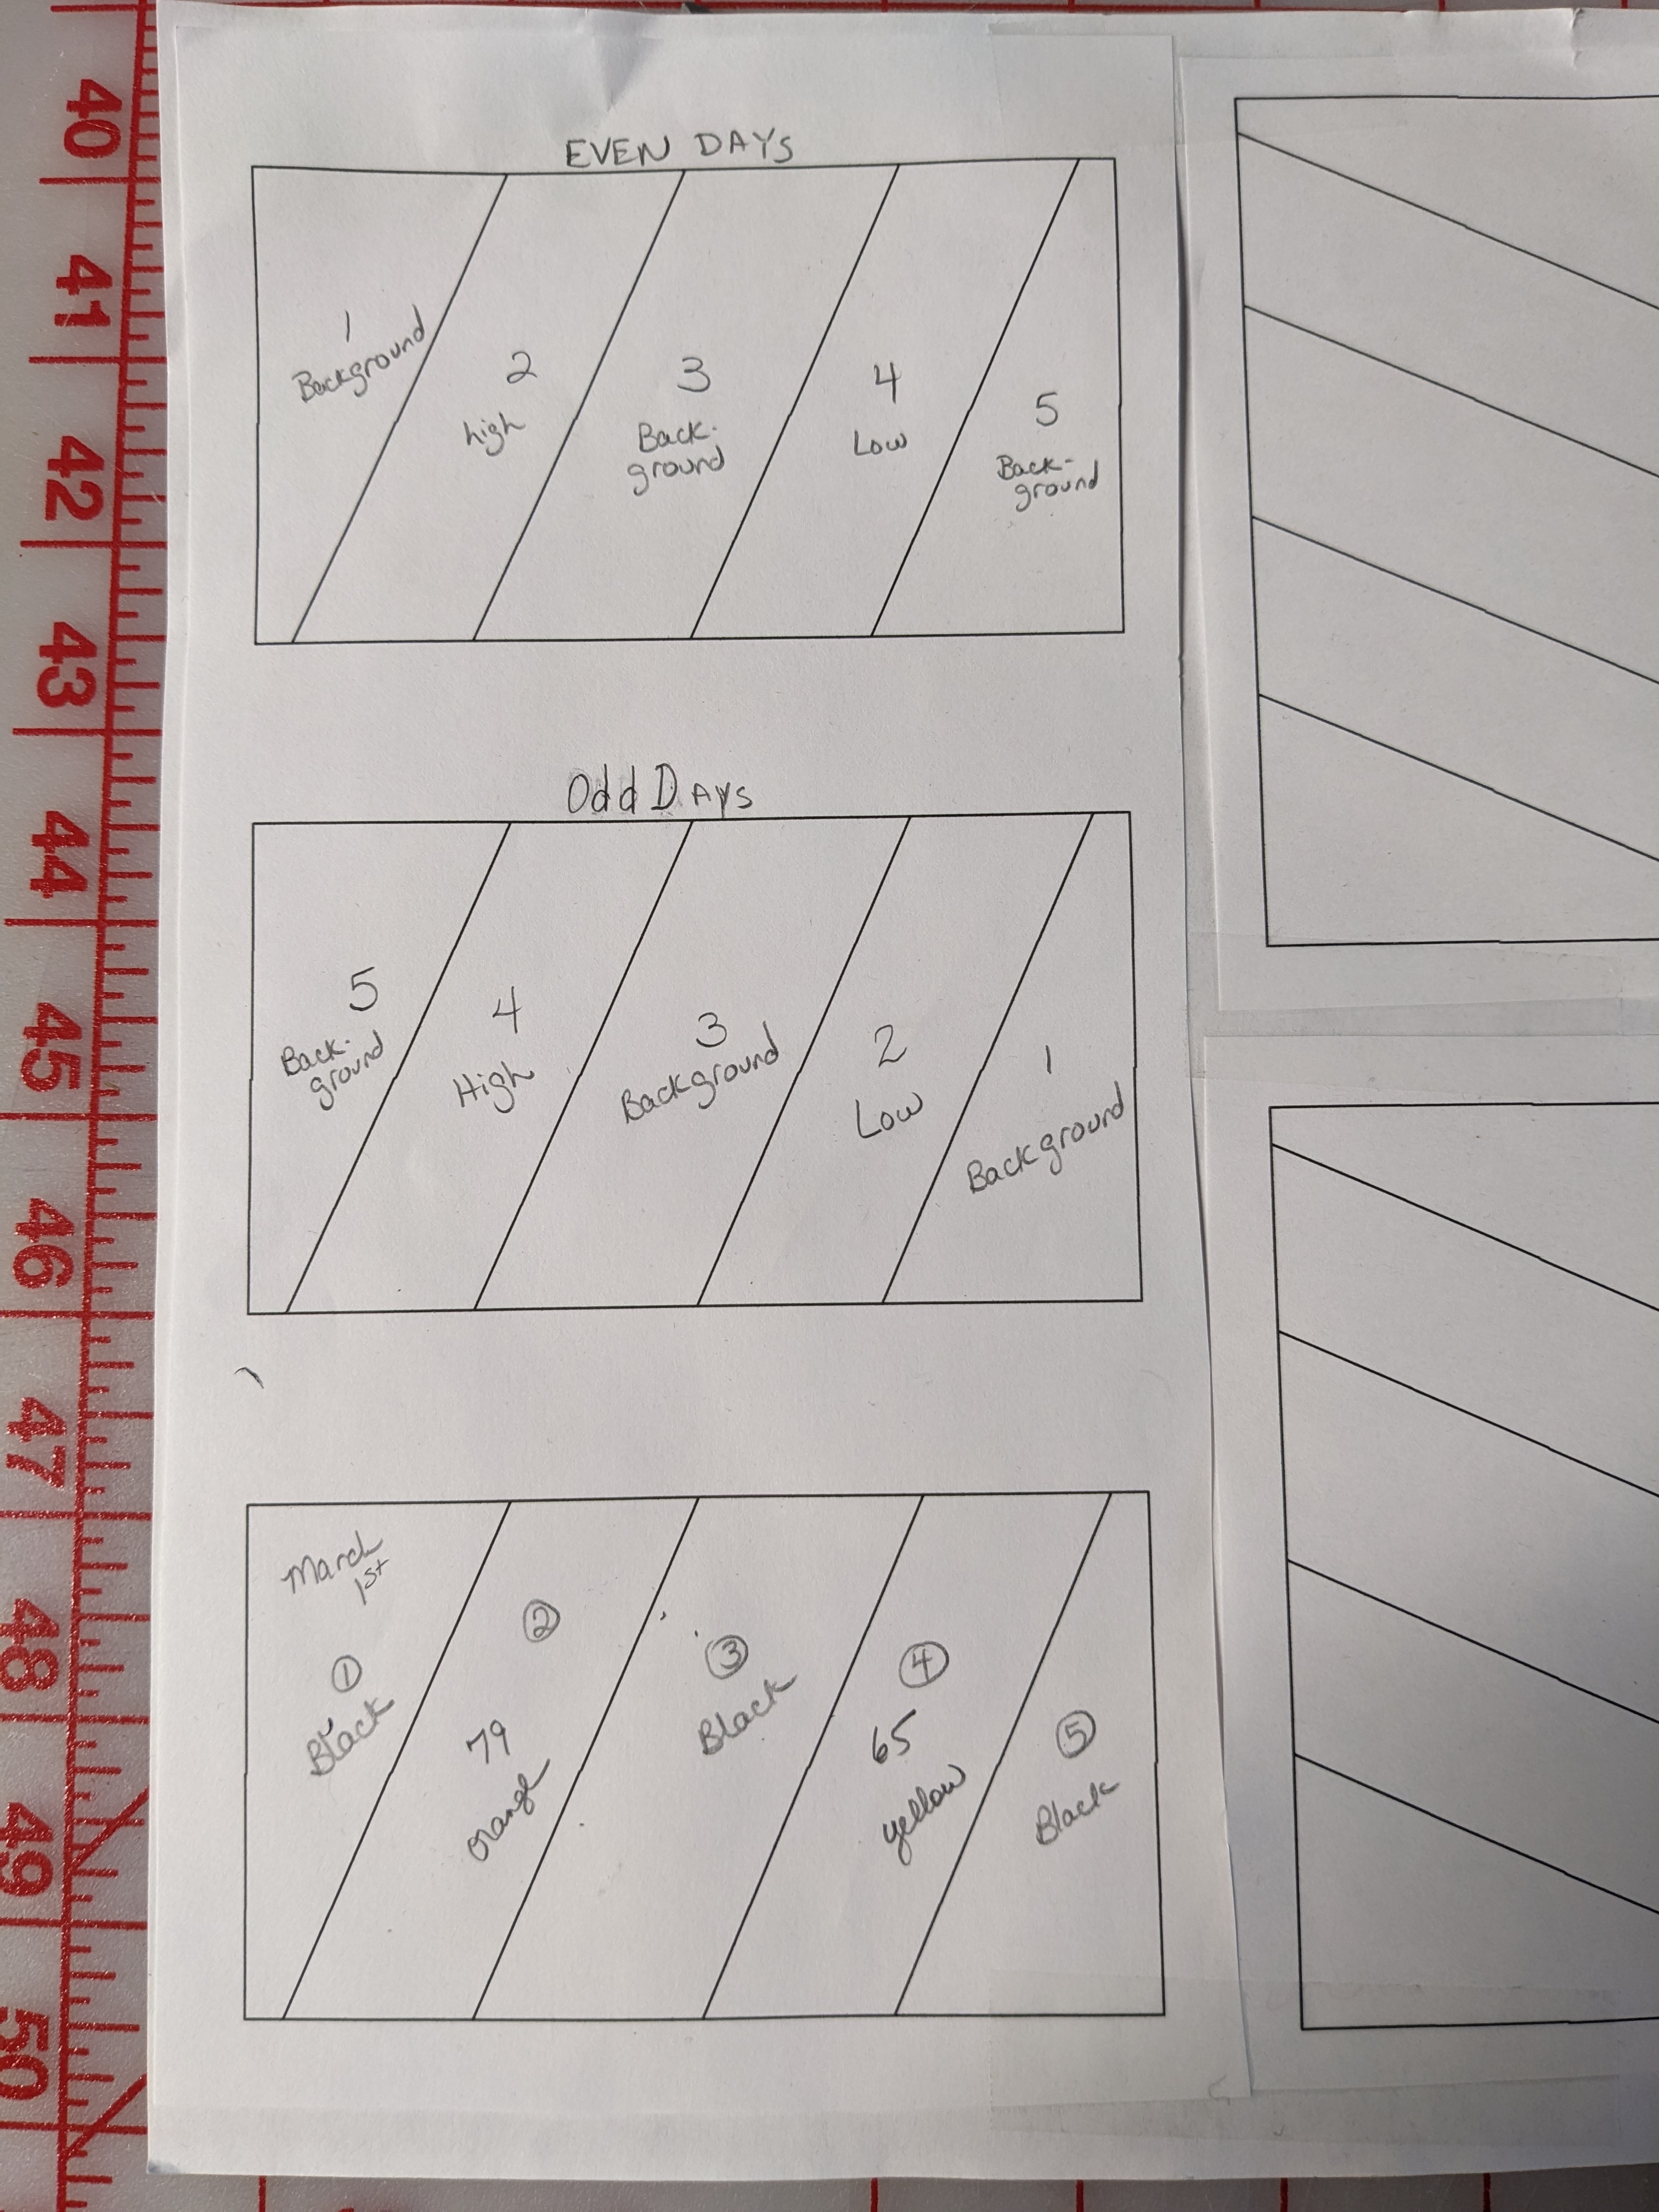
This is the pattern I created. The even numbered days start on the left. The odd numbered days start on the right. The last block shows how I marked each block with the date, order of piecing, with high and low temperatures marked on their appropriate spaces. It's important to note that the frame on this block is for the finished size. When you trim the block after all the pieces are attached, you add a quarter inch to all sides.
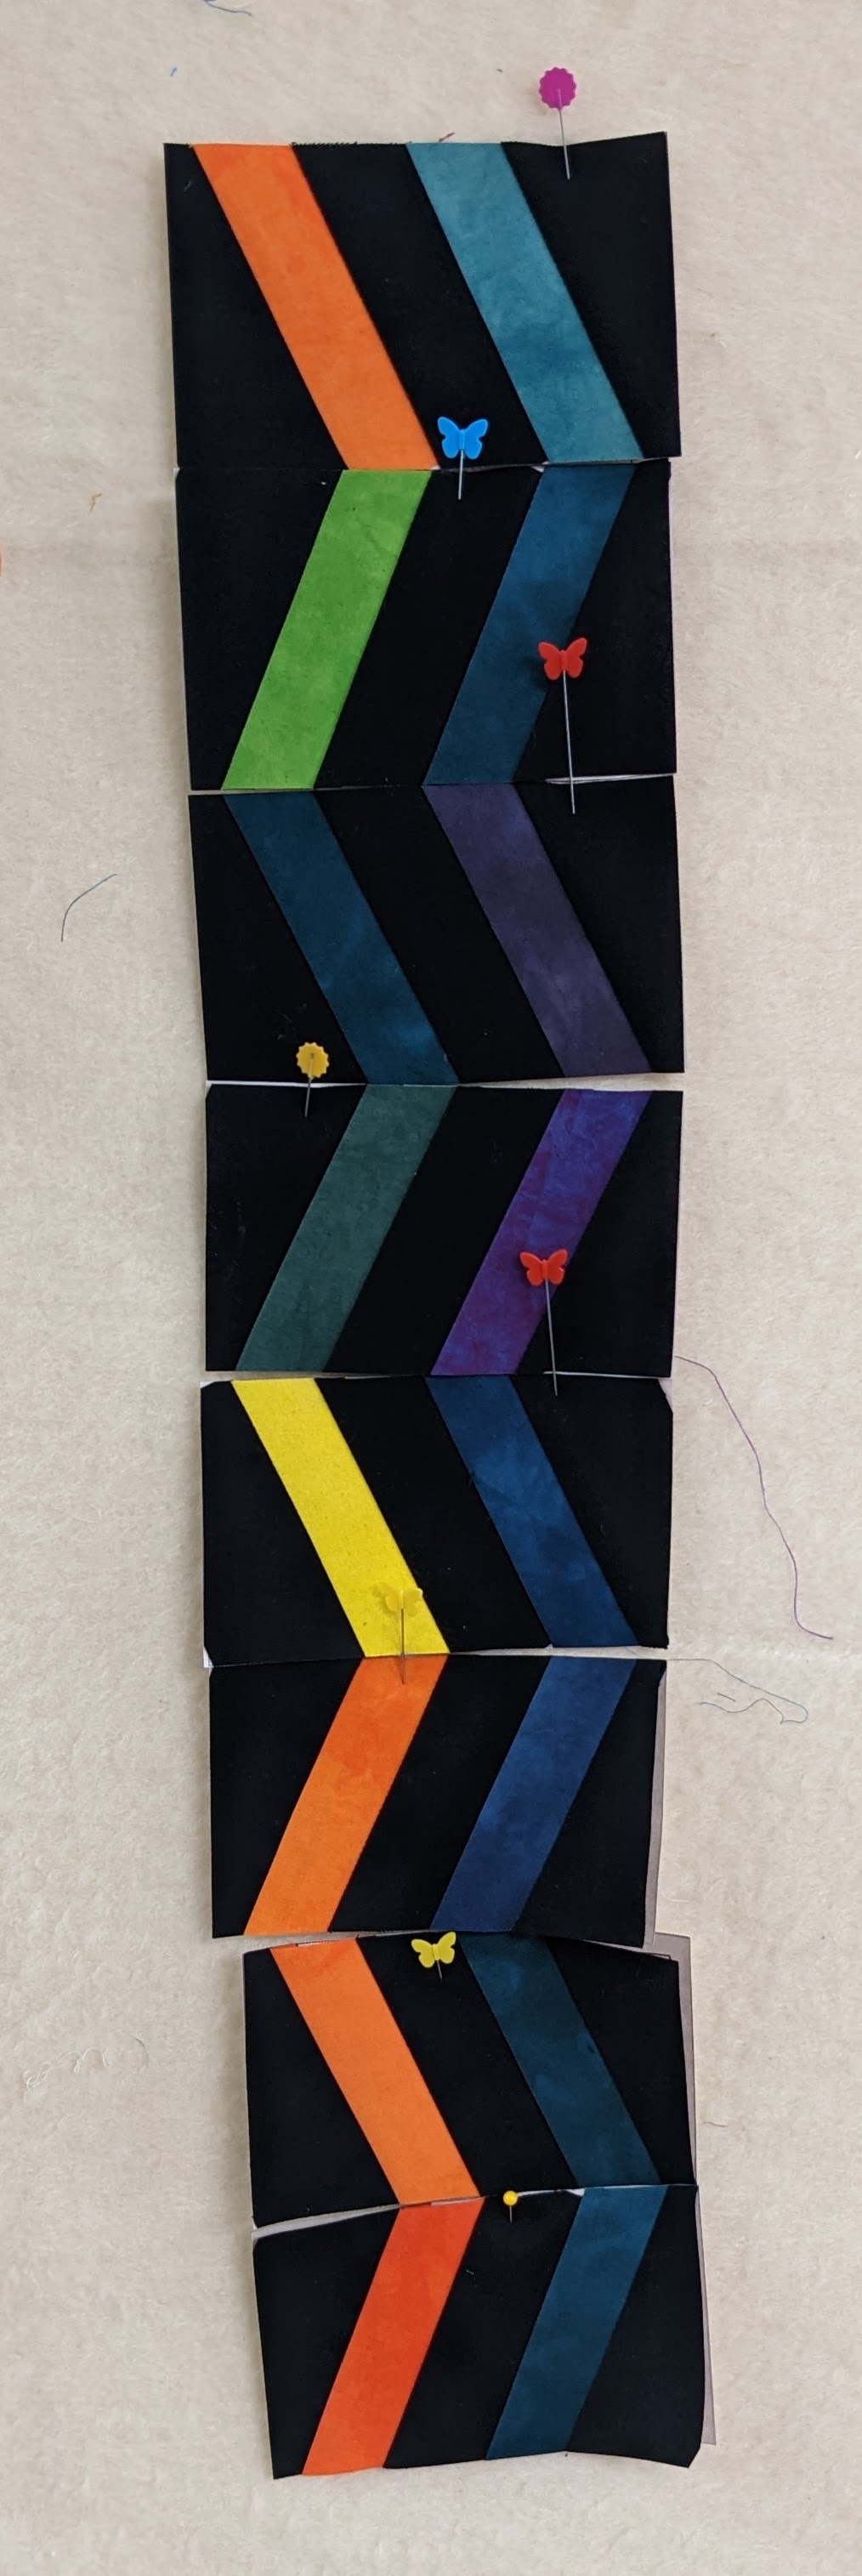
Testing the look of the first few blocks (on the design wall).
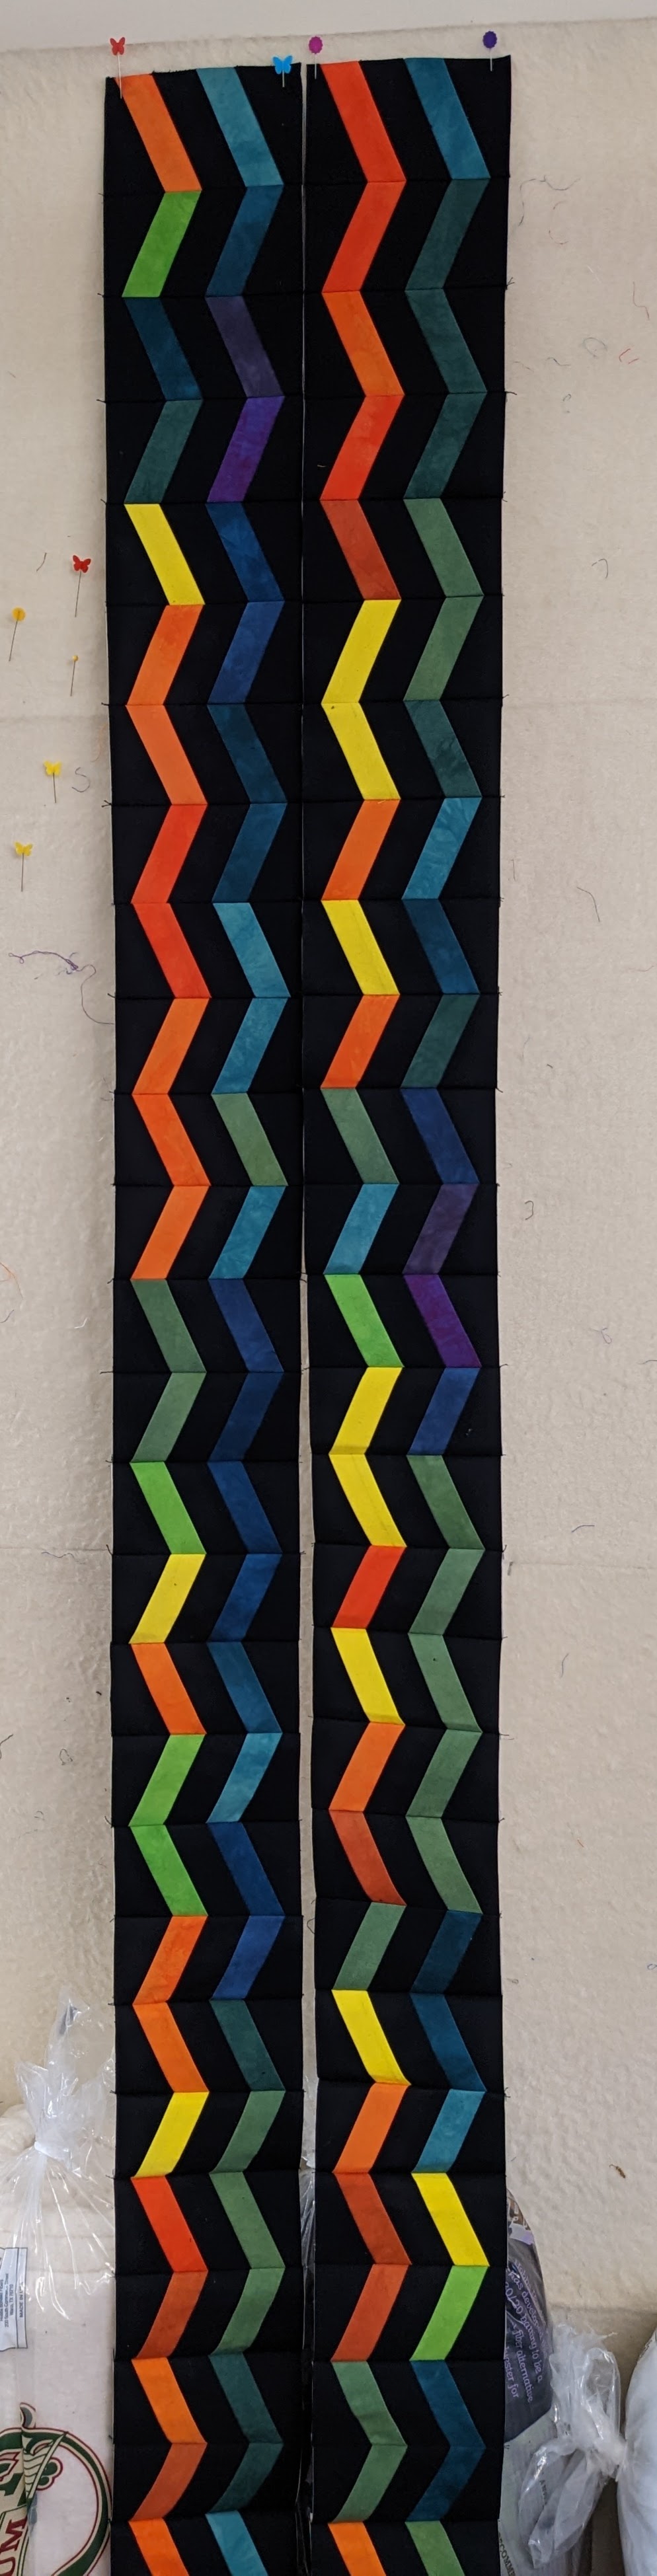
Yay! Completed a couple of months.
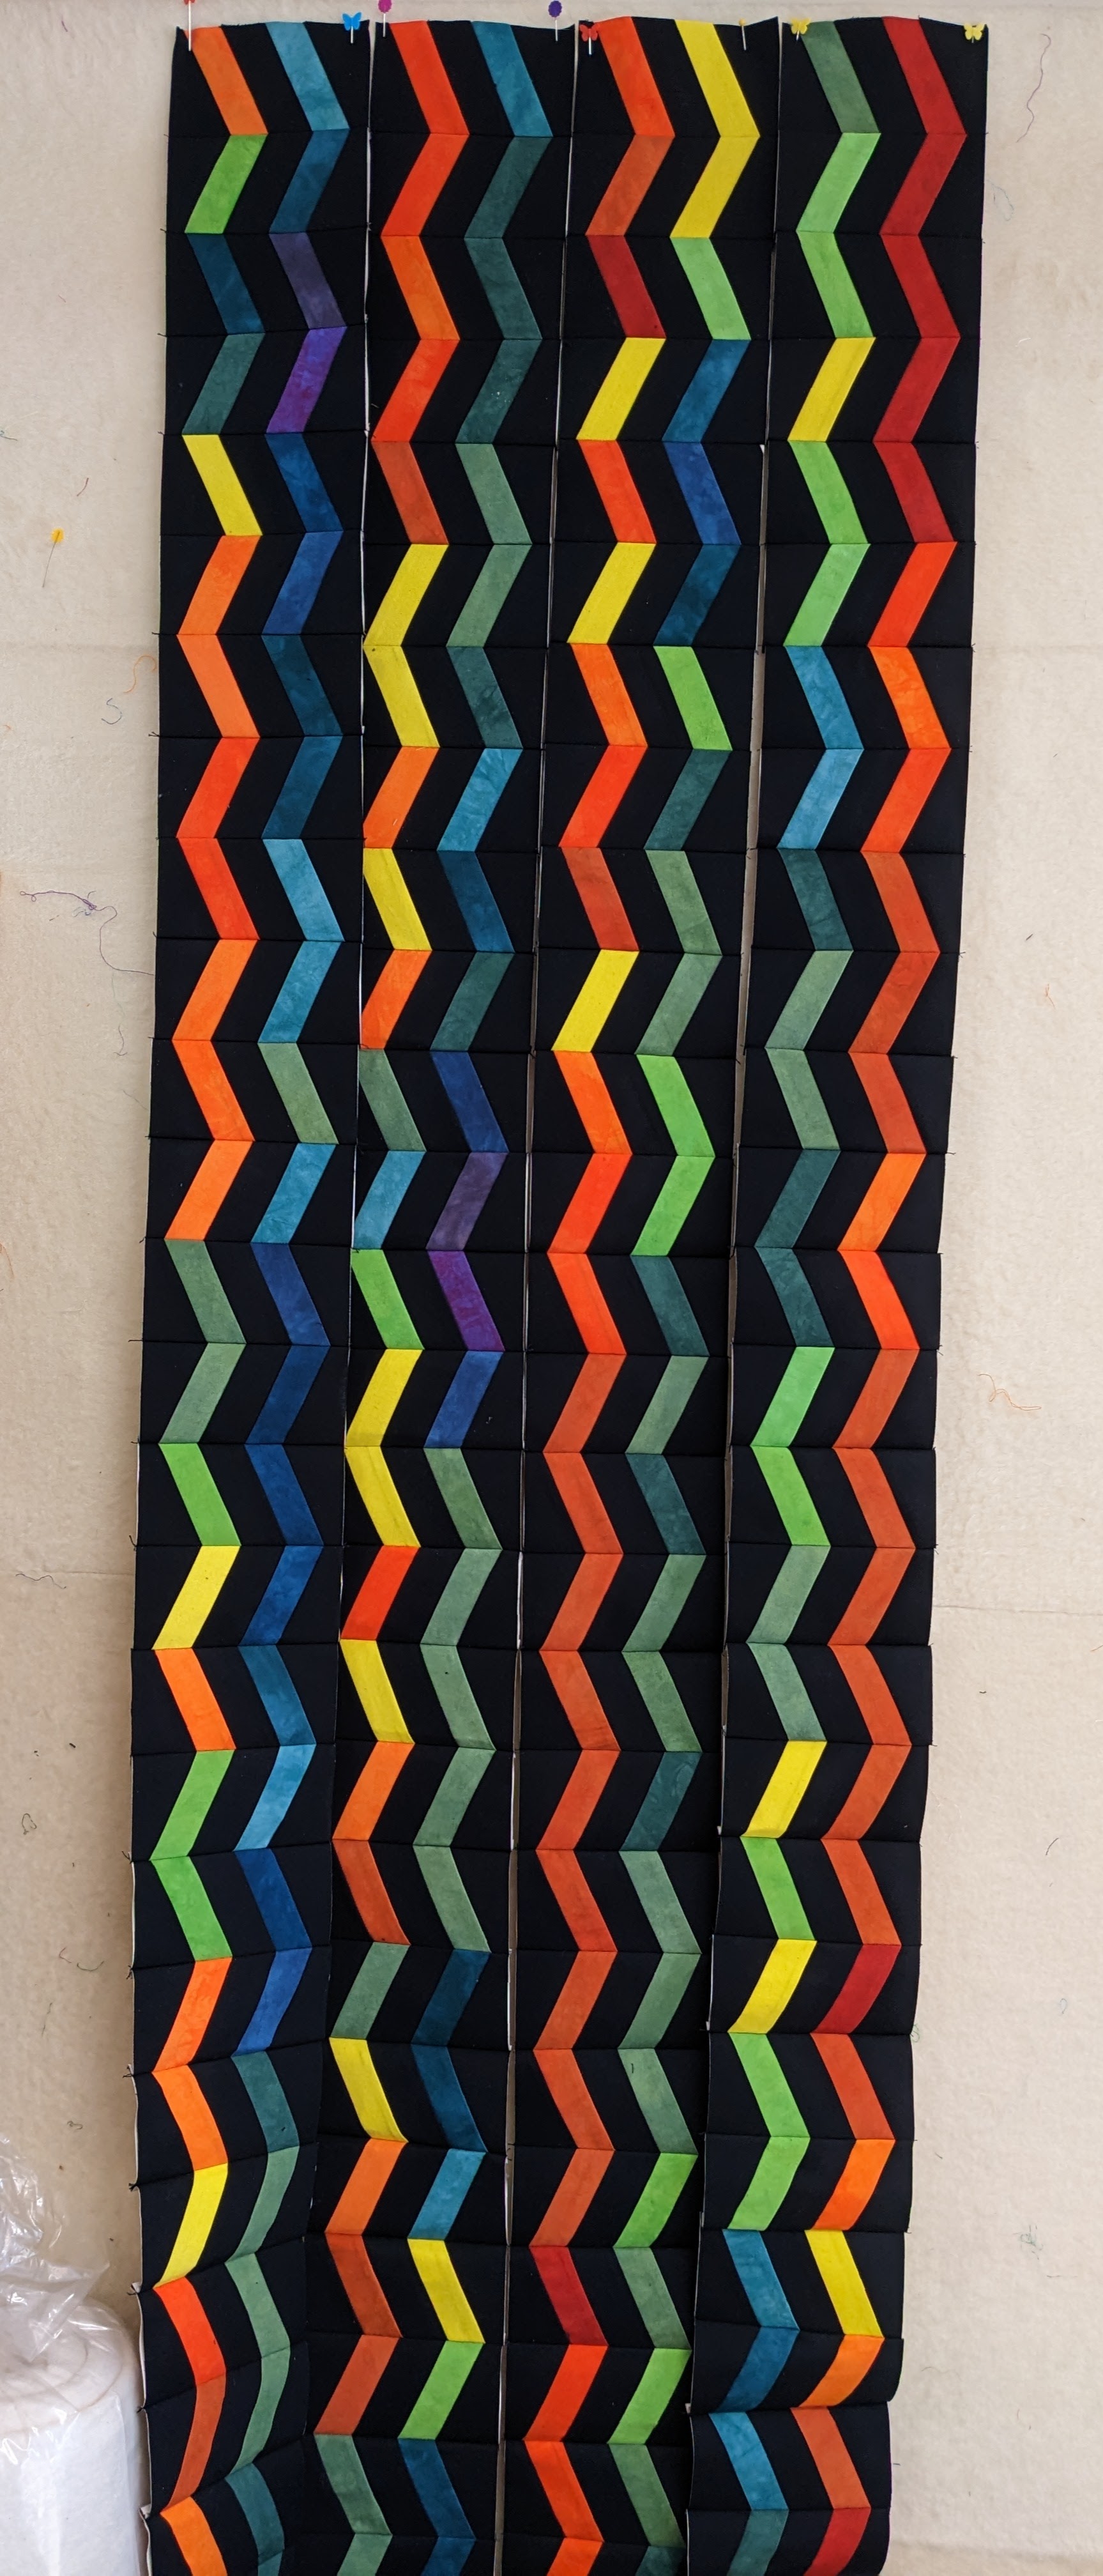
All right! A few months completed! Uh oh - do you see it? The last one is backwards - the low temps are on the left (this is one of 3 that I had to take apart and reassemble).
Comments